Setup guide · about 10 min
Form to Sheet + Alert: setup guide
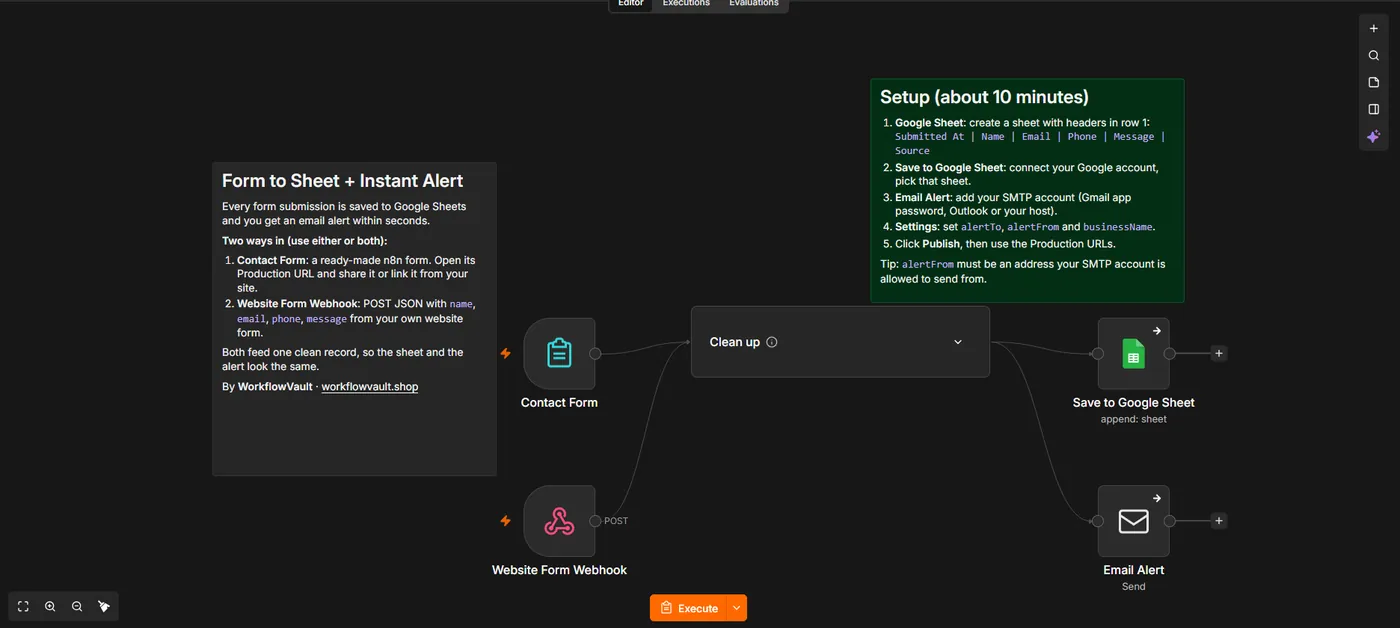
Both the n8n form and the website webhook pass through Clean up, which trims and lower-cases the email, adds a readable timestamp and marks the source. The sheet is written in RAW mode, so phone numbers and text starting with = are saved as plain text, never as formulas.
How it works
STEP 01
Import the workflow
In n8n open Overview → Create Workflow, then the ⋯ menu (top right) → Import from File and pick the .json file. Sticky notes on the canvas repeat the key steps.
STEP 02
Create the Google Sheet
Make a new sheet and type these headers in row 1, exactly as shown:
Submitted At Name Email Phone Message Source
STEP 03
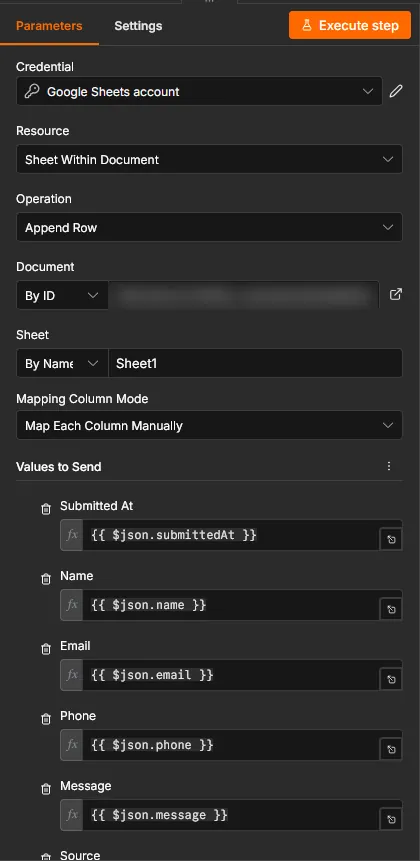
Connect Google Sheets
Open Save to Google Sheet → Credential → Create new → Sign in with Google. Set Document to your sheet and Sheet to the tab name, usually Sheet1.
Self-hosted n8n? Google sign-in needs your own OAuth app: in Google Cloud Console create a project, enable the API (Gmail and/or Sheets + Drive), set up the consent screen with yourself as a test user, and create a Web application OAuth client with redirect URI https://YOUR-N8N-URL/rest/oauth2-credential/callback. Paste the Client ID and Secret into the n8n credential.
STEP 04
Connect your email (SMTP)
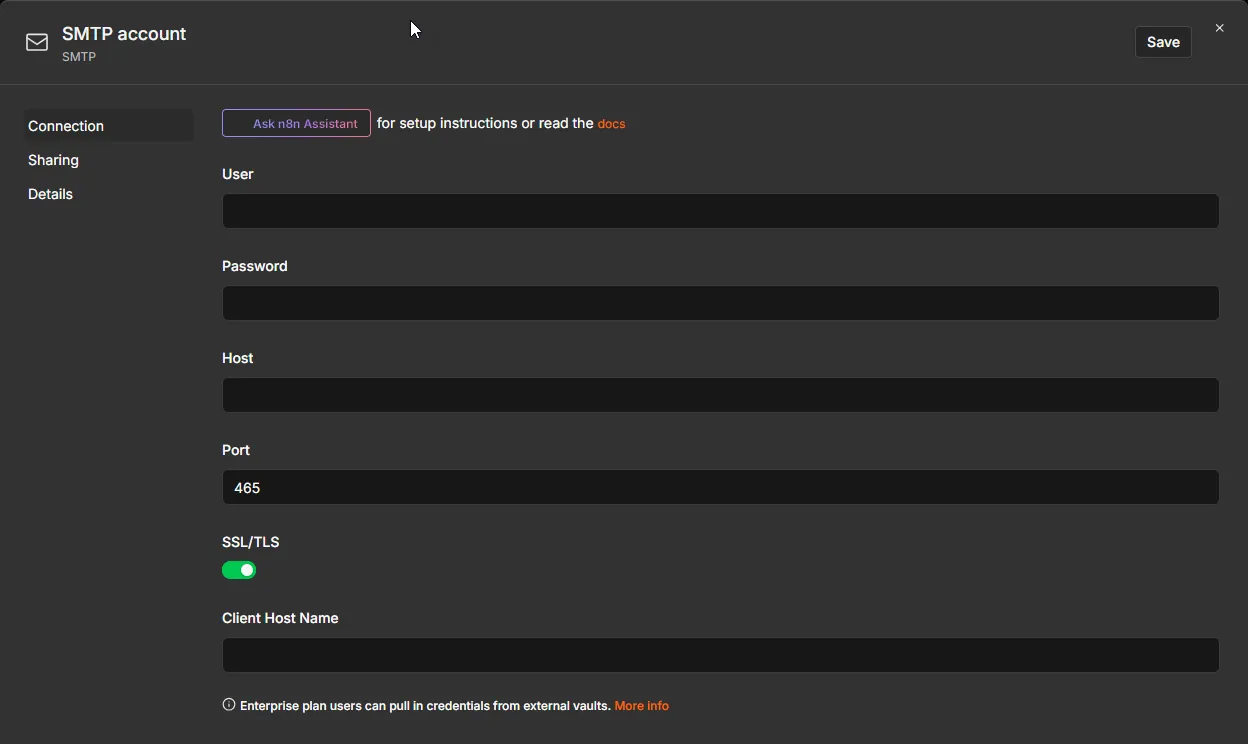
Open Email Alert and add an SMTP credential.
Click Create credential, search SMTP and fill in your provider's details:
| Field | Gmail | Outlook / Microsoft 365 | Your own domain |
|---|---|---|---|
| Host | smtp.gmail.com | smtp.office365.com | from your email host |
| Port / SSL | 465, SSL on | 587, SSL off (STARTTLS) | usually 465 + SSL |
| Password | an App password | password or app password | mailbox password |
STEP 05
Fill in Settings
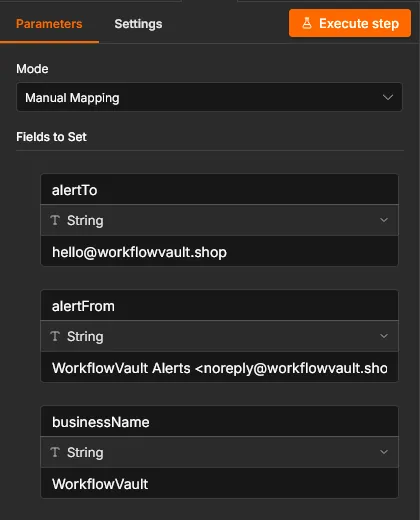
Open the Clean up group → Settings:
- alertTo: where alerts go.
- alertFrom: the sender, e.g.
Form Alerts <alerts@yourcompany.com>. Your SMTP account must be allowed to send from it. - businessName: shown in the subject.
STEP 06
Send a test submission
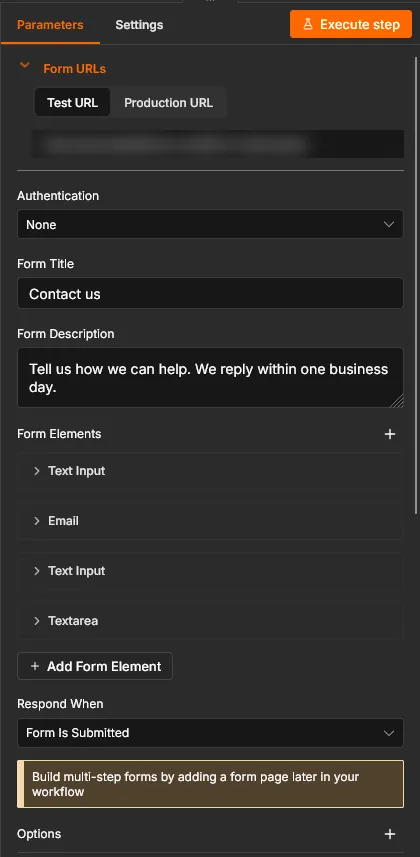
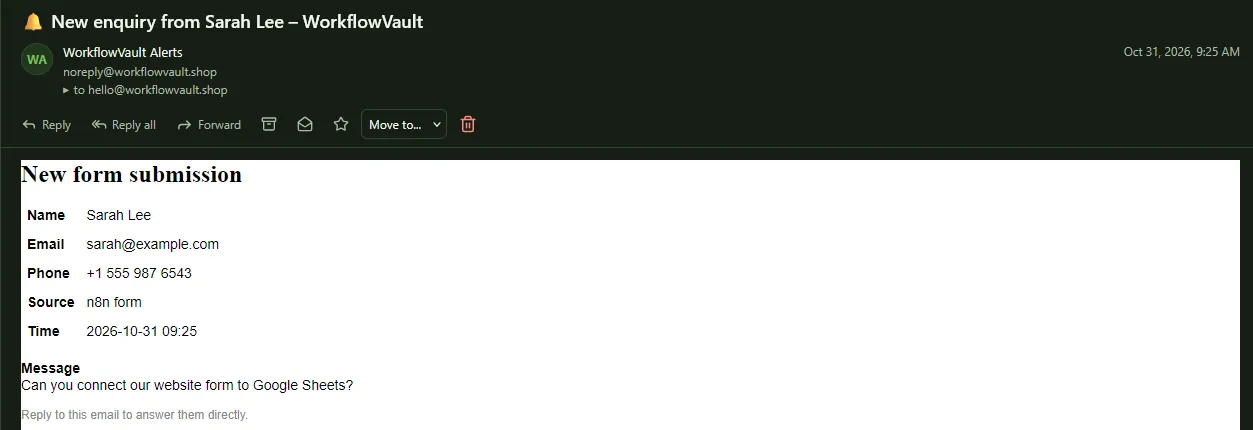
Double-click Contact Form, open the Test URL and submit. A row appears in your sheet and the alert reaches your inbox within seconds.
STEP 07
Go live
Click Publish. Share the Contact Form's Production URL, or point your website form at the Website Form Webhook Production URL with a JSON POST:
{"name": "Jane", "email": "jane@company.com", "phone": "+1 555 123 4567", "message": "Hi!"}
What you'll see

Troubleshooting
No row appears in the sheet
Row 1 must have the six headers spelled exactly as above, and Sheet must match the tab name.
Email alert fails with an authentication error
For Gmail use an App password (Google Account → Security → 2-Step Verification → App passwords), not your normal password.
Real visitors' submissions don't arrive
The workflow must be Published and your site must use the Production URL, not the Test URL.
Can I get WhatsApp alerts too?
Yes, add a WhatsApp or other messaging node after Clean up, next to Email Alert.
Need help?
Email hello@workflowvault.shop with a screenshot of the node and the error. Want it installed for you? Ask for a Template install.